
Summary
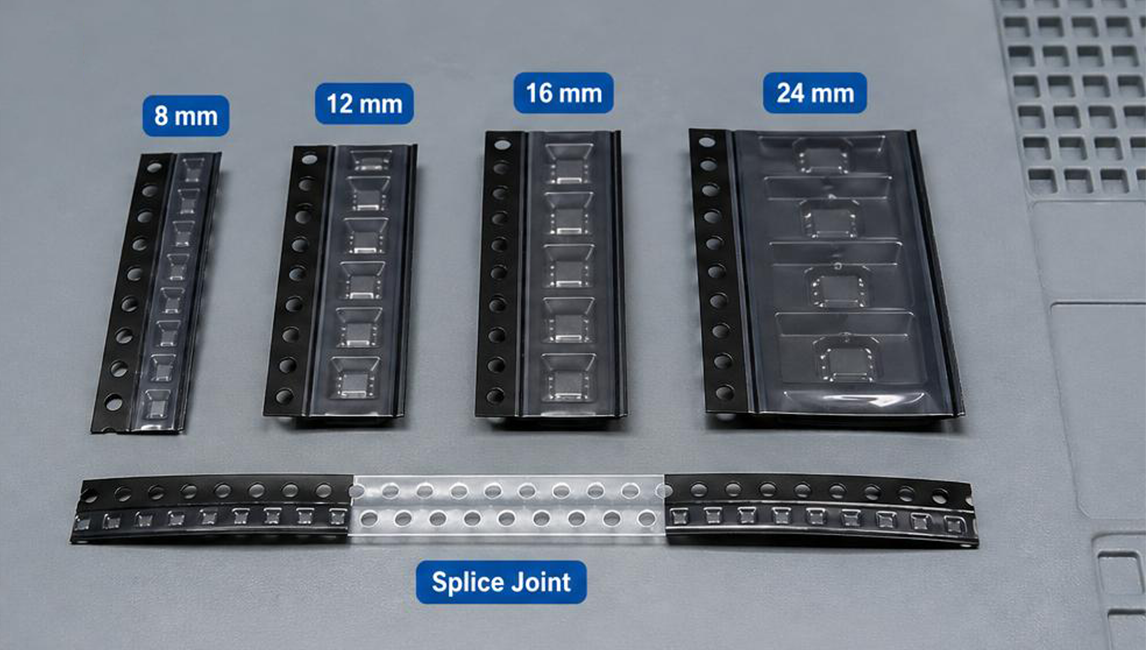
Choosing the right SMT splice tape is not only about adhesion. For stable passthrough and reliable indexing, you must match splicing materials to carrier tape width/pitch, carrier material, and feeder tolerances. Poor matching is a common cause of jams, mispicks, and inconsistent changeovers across shifts.
This guide provides a practical selection framework and a procurement-ready specification checklist.
Step 1: Identify Your Carrier Tape Width and Pitch
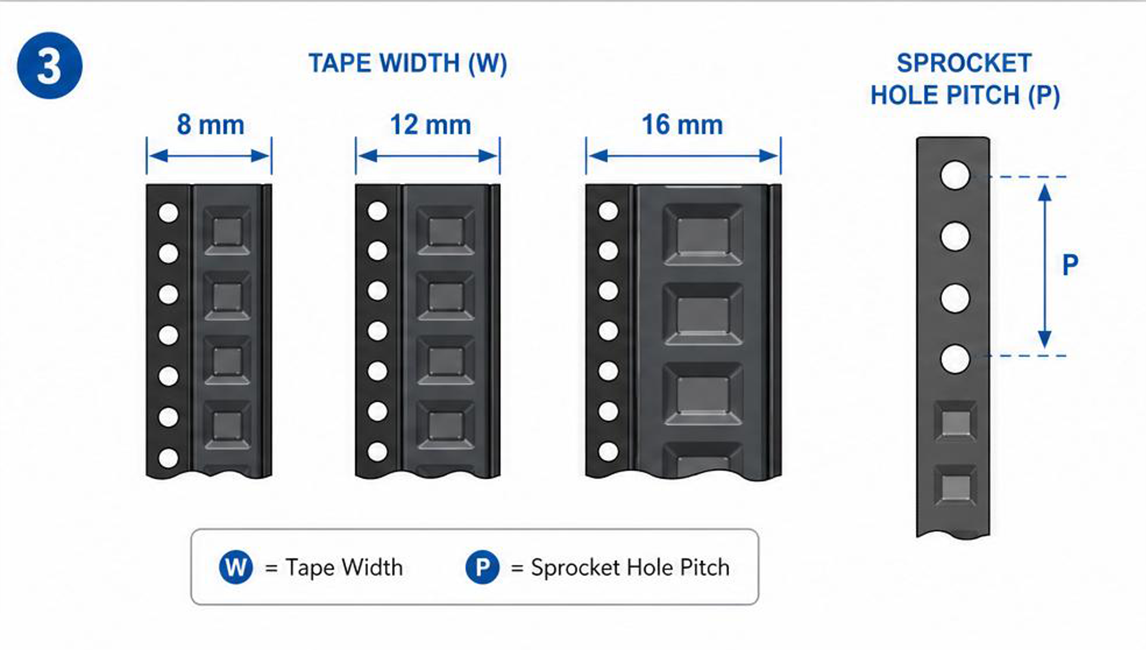
Most SMT lines work with multiple tape formats. The first requirement is to capture:
Width (common formats include 8 mm, 12 mm, 16 mm, 24 mm, and beyond)
Pitch (sprocket-hole spacing) and pocket geometry
Cover tape behavior (peel angle and peel force can affect stability around the splice)
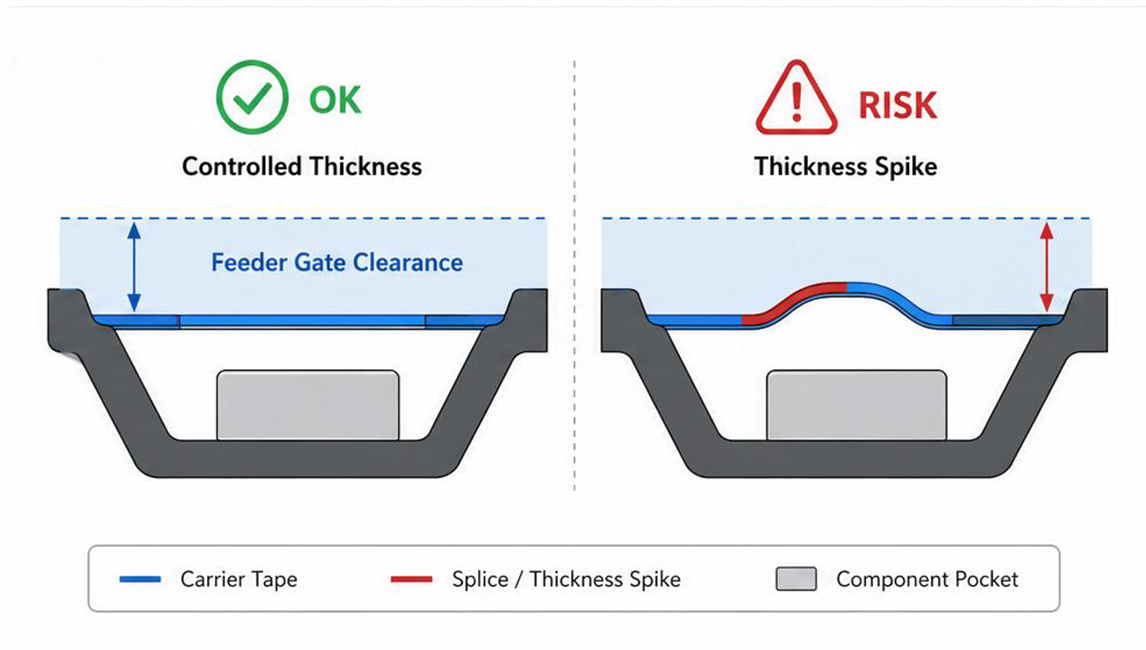
Why it matters: if the splice or shim interferes with sprocket holes, or if thickness spikes exceed clearance, feeder stability will degrade.
Step 2: Confirm Carrier Tape Material (Paper vs Plastic)
Carrier tape material influences adhesive performance and residue risk.
Capture:
paper carrier vs plastic carrier
surface energy and contamination risk (oil/dust)
whether the joint area is cleaned/controlled
Selection implication: choose a splice tape adhesive system that bonds consistently to your carrier type and supports stable peel behavior.
Step 3: Understand Feeder Tolerance and Speed
High-speed feeders have tight clearance zones. A splice can introduce:
local thickness peaks
stiffness changes
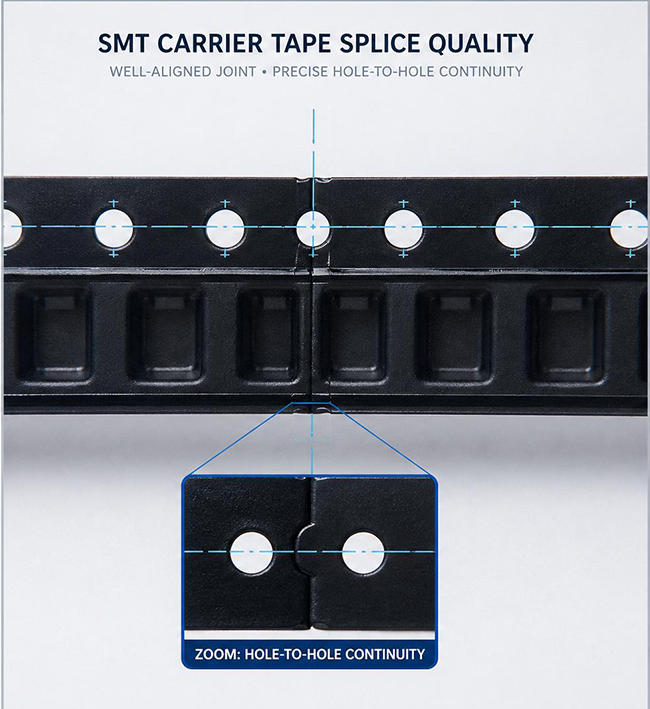
slight misalignment near holes
For critical lines, consider:
controlled thickness splice tape
shims/clips for joint stability
splice tools/jigs for repeatable alignment
Step 4: Decide Between Single vs Double Splice Tape
Both types are used in production; the choice depends on mechanical stress and changeover discipline.
General guidance (application dependent)
Single splice tape: faster manual splicing, common for standard lines
Double splice tape: added security where tension is higher or where the splice zone is more demanding
Your validation should include: passthrough test, hole registration check, and residue inspection.
Step 5: When to Add Shims/Clips and Tools
Shims/clips and splice tools improve repeatability on:
higher speed lines
wider carrier tapes
builds where mis-pick near splice is costly
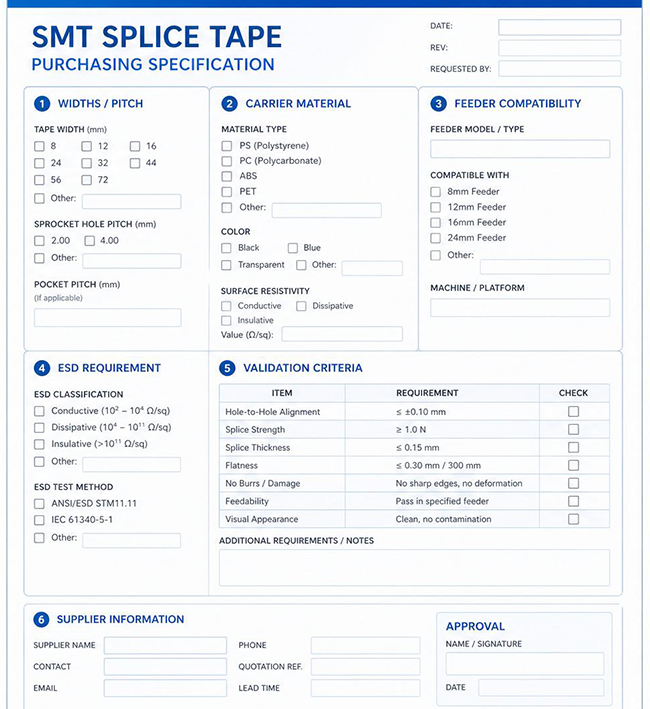
Procurement Checklist: How to Specify Splice Tape Correctly
If purchasing only says “splice tape,” you may get inconsistent results. Use a procurement-ready spec that includes:
Required information
carrier tape width range used (e.g., 8–72 mm)
carrier material (paper/plastic)
intended use: single splice / double splice / ESD-safe (if required)
feeder type/model and typical line speed (if available)
packaging preference (roll length, dispenser type)
Recommended validation criteria
passthrough at feeder gate and guides
hole registration at the joint (visual check)
residue inspection after cycling
repeatability across operators (standard work)
FAQ
Q1: What is the most common cause of splice-related feeder issues?
Thickness spikes, hole misalignment, and residue are the most frequent root causes—especially when materials are improvised or not matched to the carrier type.
Q2: Is double splice tape always better?
Not always. It can provide additional security, but validation should confirm passthrough and flatness for your feeder clearance.
Q3: Do I need ESD-safe splice tape?
Use ESD-safe materials when handling ESDsensitive components and when your ESD control program requires material controls.
Request Samples or a Bulk Quote
To recommend a compatible splicing solution, share:
tape width/pitch and carrier material
feeder model and line speed
your current failure mode (jam, mis-pick, residue)
monthly usage estimate and shipping country