
Summary
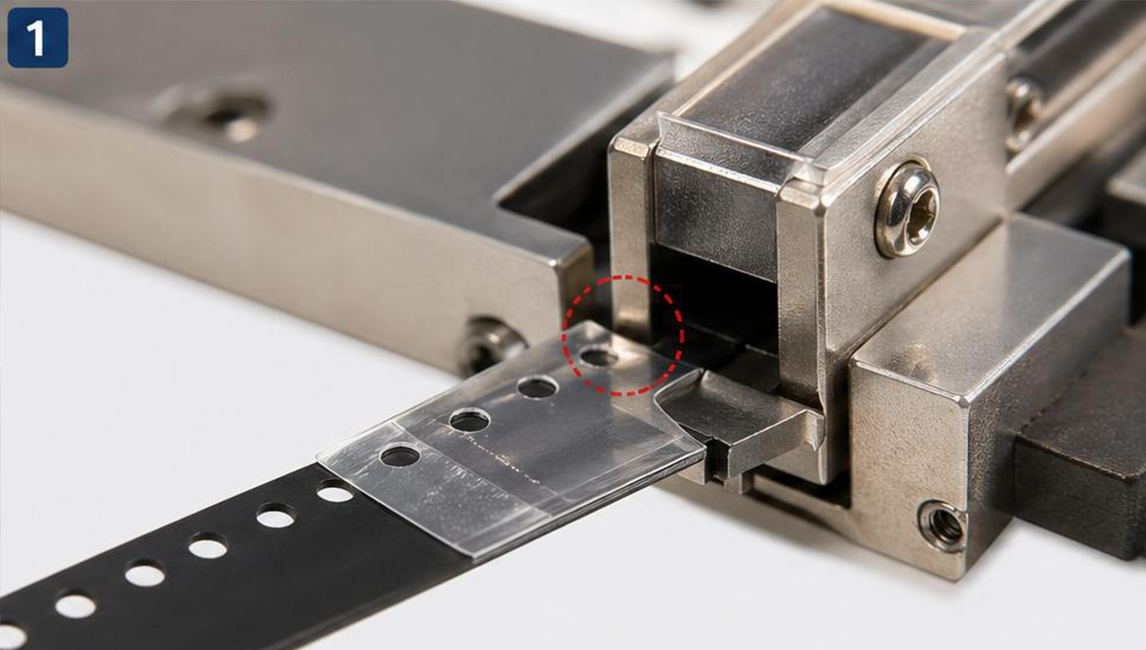
Feeder jams that occur “right after a splice” are rarely random. They usually trace back to a small number of mechanical and process variables: joint thickness spikes, edge lifting, residue, misaligned sprocket holes, or improper passthrough verification.
This guide gives a practical troubleshooting flow, a repeatable inspection checklist, and prevention tactics (including why controlledthickness splice tapes, shims, and consistent pressure matter).
Why “After-Splice” Jams Happen
Modern feeders are designed around consistent carrier tape geometry. A splice can introduce variability in:
thickness (tape + overlap + shim/clip)
stiffness and flatness
sprocket hole registration
friction from adhesive squeeze-out or residue
The result can be a jam, sensor alarm, or misfeed—especially on high-speed lines and narrow clearances.
Quick Triage: What Does the Jam Look Like?
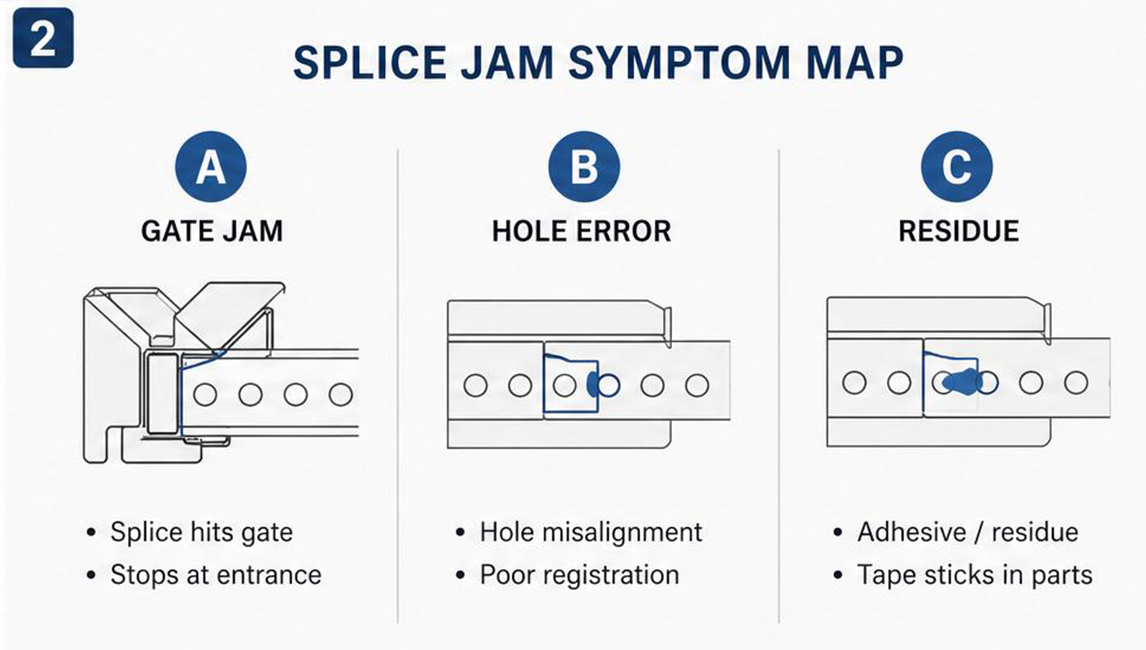
Start by classifying the symptom. It narrows the root cause quickly.
Symptom A: Jam at Feeder Gate / Entry
Most likely causes:
thickness spike at joint
uneven overlap (one side higher)
edge lifting or curled tape
Symptom B: Indexing Slip / Sprocket Hole Error
Most likely causes:
sprocket hole misalignment at splice
damaged holes near the joint
joint too stiff causing irregular advance
Symptom C: Residue / Sticky Build-up
Most likely causes:
unsuitable adhesive (office tape, unknown tape)
squeeze-out from over-pressing or incompatible adhesive
Troubleshooting Flow (Repeatable, Line-Friendly)
Use this order to avoid chasing random variables.
Step 1: Stop and Preserve Evidence
Keep the jammed tape section (do not tear it away)
Photograph the jam point and the splice joint
Note feeder ID, tape width/pitch, and line speed
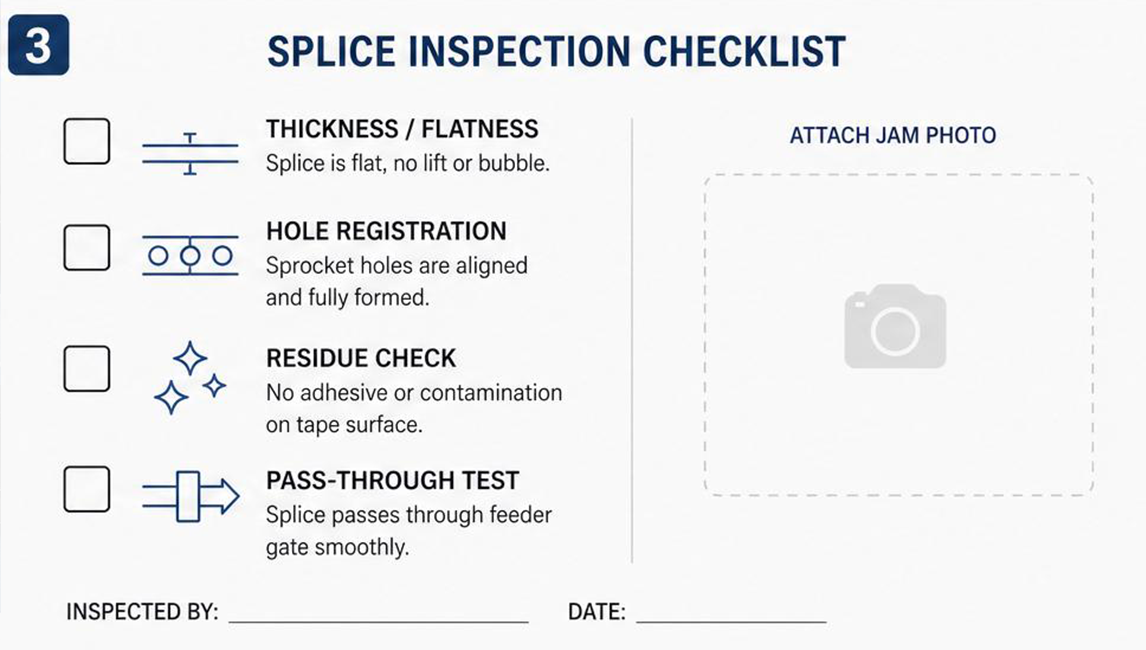
Step 2: Inspect Joint Thickness and Flatness
Check for:
raised overlap area
wrinkles or bubbles under tape
edge lift (especially at corners)
Practical test: run the splice through the feeder gate by hand (with power off) to feel interference.
Step 3: Verify Sprocket Hole Registration
Confirm:
hole-to-hole alignment across the joint
holes are not partially covered
pitch is consistent
Step 4: Check Adhesive Residue Risk
Look at:
feeder gate, guides, and drive gear surfaces
any sticky film or debris attraction around the splice zone
Step 5: Confirm Operator Method
Ask:
was the joint aligned on a flat surface?
was pressure applied evenly?
were shims/clips used correctly (if required)?
The Most Common Root Causes (and Fixes)
Root Cause 1: Thickness Spike at the Joint
Why it happens: double overlap, thick tape, uneven overlap, or excessive materials near the joint.
Fix
use controlledthickness splice tape (production-grade)
reduce overlap length to what your method requires
press evenly to avoid localized thickness peaks
verify pass-through at low speed before ramping up
Root Cause 2: Edge Lifting / Curling
Why it happens: poor bonding surface, contamination, uneven pressure.
Fix
clean the joint zone (dust/oil)
use proper pressure tool/roller
avoid touching adhesive surfaces with bare fingers
Root Cause 3: Sprocket Hole Misalignment
Why it happens: splicing without alignment reference, hurried changeovers.
Fix
align sprocket holes before bonding
use alignment tools or shims where required
add a “hole registration check” to the standard work
Root Cause 4: Adhesive Residue and Debris Attraction
Why it happens: non-industrial adhesives, incompatible tape, or squeeze-out.
Fix
avoid office tapes and unknown adhesives
use residue-controlled industrial splice tapes
clean feeder surfaces and re-qualify splicing materials
Prevention: Build a Standard Splicing Method
The goal is not a one-time fix—it’s a stable process.
Recommended standard work
define approved splice tape types per line (single/double/ESD-safe if needed)
define when to use shims/clips and which widths/pitches require them
require a quick “hand pass-through” test at the feeder gate
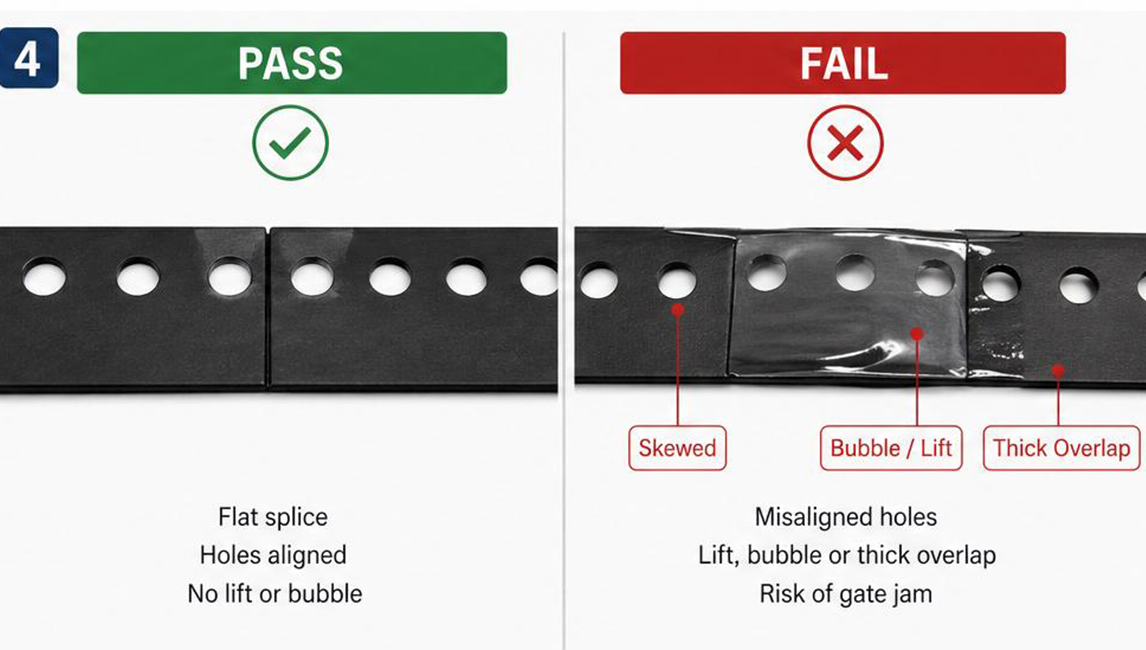
maintain a pass/fail reference card for operators
audit splices weekly (spot checks across shifts)
Request Samples or a Bulk Quote
To recommend the right splice tape and method, share:
tape width/pitch (e.g., 8–72 mm) and carrier material (paper/plastic)
feeder model and line speed
typical jam location and a photo of the joint (if available)
monthly usage and shipping country